Nikon Monarch 7 Binoculars Quick Review

A good pair of binoculars is optically clear, compact enough to be easily carried, and durable enough to withstand unusual conditions. Monarch 7 binoculars, from Nikon, meet all of these criteria. By combining the best in optical technology with a sturdy, well engineered design, Nikon has made a pair of binoculars that will meet almost any need.

Features

The Nikon Monarch 7 binoculars feature low dispersion glass, phase correcting roof prisms, and dielectric high reflection prism coatings to make the optical image created for the viewer as clear and true to life as possible. All of these elements combine to make a very high fidelity viewing experience, as well as to ensure that glare or other light phenomena do not compromise the view. In addition, scratch resistant coatings are applied to all exterior lenses to guard against damage. The binoculars are also sealed with o-rings and filled with nitrogen gas to maintain a water resistant seal that is effective in up to 3 feet of water for up to 10 minutes. The binoculars can also be affixed to a tripod for stationary viewing, and feature flip down lens caps.

Durability

Binoculars, being a very fine and precise optical tool, are often thought of as being fragile. With the Monarch 7 binoculars, this is not the case. Owing to the durable casing and the many protective features designed to protect the optical components, these binoculars are up for just about anything that may get thrown at them. These are ideal as sporting binoculars, and would do well on a nature excursion or in other sporing situations.

Optical Accuracy

Nikon Monarch 7 binoculars are quite good optically. The many glare and refraction reducing features create an image that is clear and not distorted or fuzzy. These same optics also present the viewer with a very true to life representation of color and brightness.

Price

Good binoculars are never cheap. While different retailers vary somewhat in price, the average seems to run around $400. Considering the quality of the binoculars, this is quite reasonable. Given that many high end binoculars can run half again as much as this or even more, the Monarch 7 binoculars are well priced.

Drawbacks

Despite their very high quality and reasonable pricing, there have been some minor complaints regarding the Monarch 7 binoculars. The most common, and also most major, is that the binoculars are difficult to get into good focus. While adjusting the focus on them is quite is easy, it can be tricky to dial in the focus for a crisp and clear image. Another, albeit less major, complaint has been that the instructions that come with the binoculars are poorly worded and difficult to follow. Several of the instruction sections seem to have no illustrations, thus compounding the problem of clunky wording. However, given the prevalence of online video tutorials and reviews, this should present only a minor inconvenience.

Conclusion

Beyond a couple of very minor drawbacks, the Monarch 7 binoculars from Nikon are an excellent pair of medium priced binoculars. While certainly not military grade, they will suffice for almost any normal usage. They are also extremely durable, allowing them to be taken on hikes, nature outings, bird watching, or just about any other expedition you may have in mind. The optics produce a very clear and undistorted image that is both bright and colorful. The same features that make the binoculars water resistant also serve to keep it sealed against atmospheric humidity, preventing the lenses from fogging up and producing a blurry image.

Bushnell Banner 4-12x40mm Review

No matter how many times the “one that got away” story gets told, it never really makes the hunter feel any better. The excuses are abound from sun glare to a deer getting spooked and it never seems to be the shooters fault. But we all know that a bad shot can happen, but equipment failure just makes it that much worse because it’s avoidable. Fortunately for the avid sportsman and target shooter, Bushnell makes this excellent Banner 4-12x40mm rifle scope. For scopes in this price range, the quality and durability are simply unmatched by anyone else.

Let’s face it, there are a lot of products out there on the market that will promise the moon but when out of the box and on the rifle, it just never makes the grade. It always seems like quality comes at a huge cost. Well, not anymore. With this Bushnell product on the shelves, the true hunter can finally get the clarity and range he or she needs without having to mortgage the house to get it. If there was one single complaint in the mid-range scope market it would be clarity. We all know field of vision becomes more of an issue the lower we get in price. Well, this product takes care of that age old dilemma once and for all. While the pricier scopes are a bit clearer around the edges, this product boasts an excellent field of vision and performs exceptionally well in low light. The Bushnell Banner 4-20x40mm finally offers this kind of quality coupled with affordability. Sure, we’d all like to head out and get an insanely expensive Nikon, but with the entrance of the Banner on the market, you’d soon be asking what the real difference between the two is aside from the price tag.

Getting a good read on your target is one thing, but getting the parts to get you to that point is something entirely different. While the turret knobs can seem a little small and hard to read, the scope is extremely easy to adjust. This model even is equipped with adjustments to compensate for bullet drop – a common gripe for the bargain hunting sportsman. And once this piece is set, it’s not uncommon for it to hold at zero through several hundred rounds. The Banner is able to do this because it’s made from quality materials and construction.

So this Bushnell model is well made and has all the adjustments needed to make that shot and it’s easy to use. In fact, it’s far easier to adjust than competing brands in this price point. While many hunters wear their ability to use precise adjustments and an almost scientific approach to the sport of shooting on their sleeve, we all know that it’s intangibles that is what grabs hold of us. It’s about reading the environment and getting a feel for the shot. The simplicity of this particular scope appeals those types of shooters. Shooters who are the set-and-forget type when it comes to elevation and wind. For the marksmen who rely on reticle scaling, this Bushnell model is for you.

The performance of the Banner is so reliable that almost any hunter worth his or her salt will recommend this model for the price. The quality of the product would command twice as much if it didn’t have the name “Bushnell” stamped on it. At the end of the day, we all need to watch our budgets and make them last. For the outdoors man who needs to find a solution to dollars versus their love of shooting, the Bushnell Banner 4-20x40mm rifle scope is the clear choice.

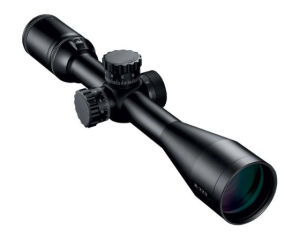
Nikon M-223 3-12x42SF Review

There are a lot of scopes on the market, giving hunters and marksmen plenty of options to choose from. There are even many scopes designed specifically for rifles that fire a .223 caliber bullet. The Nikon M-223 3-12x42SF is an excellent option in that category of scopes.

The BDC 600 Reticle

The Nikon M-223 features the BDC 600 Reticle, which was specifically designed to military grade specifications to help you accurately calculate the trajectory of 5.56 NATO rounds with the polymer tips.

For newcomers and beginners to using a scope, a reticle is the unique indicator that calculates the trajectory of a potential shot. Originally known as “cross hairs”, modern reticles like the BDC 600 are customized to particular rounds. When the M-223 has been properly “zeroed”, the BDC 600 reticle features an open circle, with hash marks to walk out the trajectory from 100 to 600 yards. Knowing that my scope is perfectly engineered for my bullet, it’s no problem at all to accurately drop a target two football fields away.

Eye Box technology

Nikon M 223A scope with the most powerful lens in the world is no good if you can’t see through it properly. I love the M-223 with its four inches of non-critical eye relief, which gives me an amazingly clear sight without risking recoil damage to my face. The ocular lens on the M-223 is huge, which gives me a super bright high-resolution view. I also like the four-time zoom range, which helps me quickly identify targets in the field.
Nikon’s patented Ultra ClearCoat optical system means that the lens is transmitting as much as 95% of the light through the body tubes. That’s simply astounding, as it means that I get a bright, sharp and fantastically crisp image.

Some beginners forget that one of the most important ways to calibrate your rifle scope is to accurately set the parallax. By using light refraction, the parallax of your intended target comes into sharp focus, giving you vital information for landing a difficult shot.

Ruggedness

I don’t buy scopes just to make my rifles look pretty. I admire the M-223 for its rugged one-piece main body tubes. Excellently engineered, I know I can rely on the scope to handle rough abuse in the field. Properly mounted, the scope is shockproof. The M-223 is also nitrogen-filled and O-ring sealed, which means it can handle any boggy, wet conditions you can throw at it. You might be freezing in the mud, but at least you can rely on your scope to give you a crisp, clear shot with no fogging.


How to Boresight a Rifle

In this topic we will be discussing how to boresight a rifle. This procedure is typically applied to pre-align the sights, making zeroing easier. An instrument called a collimator or bore sighter can be used to achieve this. It contains a bore -diameter arbor along with an optical head that is placed inside the rifle’s muzzle. The scope can then be corrected to aim at the distant target, while the rifle is fixed into position.

A modern technique used in boresighting is to always utilize a laser instead of a visual check. This process is preferable since it will allow more rifle movement, ensuring the laser dot will not part with the barrel and doesn’t require the removal of the bolt. Another refined means of bore sighting works on the collimator, an optical fastener much like a scope sight, which attaches to the end of the rifle barrel. When using this technique, the collimator and the typical sight may be sighted to match. The majority of collimators contain grid patterns to recheck the zero after the rifle barrel is sighted.

While laser technology has become less expensive, laser bore sights have become popular. One class of laser bore sight is added inside the hollow chamber and then projects a ray through the rifle and onto the objective. To get the crosshairs on the laser dot, the user will need to adjust the rifle scope until both the crosshairs and the laser meets. Another type is a universal laser bore sighter which is connected to the end of the rifle barrel. It is aligned and fixed into position allowing the laser to project a beam directly onto the target.

No matter which method of bore sighting is employed, the effect is to align the crosshairs of the scope to the place where the barrel is pointing in a particular space. Because of variations in other variables the bore and the trajectory of ammo -sighted rifle will most likely not fire to the precise area that the cross-hairs suggest, and live ammo will have to be shot to fine tune the sighting process. It could be quantified from a particular decision making position, like the orientation of notches of a gun barrel. Instead, the device could be made to adapt a variety of conditions and still be adequately exact. In this bore sighting guide, we will explain everything you need to know about your rifle scope. It is fast, simple, and requires no costly tools or unique set up.

For those who haven’t already, Install the scope on the rifle.

You will have to install scope mounts if the rifle isn’t yet built using the hardware for mounting a scope. Now you can install the mounts and make sure they are secured. Now that the rifle mounts are in place and all the components have been tightened, you can setup the scope rings on the scope and allow them to be loose enough to align into position. You are going to want the ability to rotate the scope after mounting it on the rifle and to shift it backward and forwards. Perform modifications as necessary, so your horizontal line on the reticle is level. You’ll also have to modify the eye relief on your scope. While holding the rifle in a secure firing position, shift the scope forwards or backward until there isn’t any black ring surrounding the target. Additionally, it is significant to ensure you have obtained adequate eye comfort so that the scope isn’t going to impact your face as a result of recoil.

Now to Establish a Target

A glowing red dot is surely a reliable method of bore-sighting. You are not firing at the target, only aligning your sights, and this can be something that you could do indoors, just so long as you have adequate space. Exercise effective firearm safety, double check and be certain that your rifle is unloaded before you attempt to bore sight it.

Stabilizing Your Gun

A firearm vise might be perfect for this job, while you make the adjustments needed. However, any other type of stabilizer could be helpful to hold the firearm level. Have a great sight picture together with the front sight, keeping the gun level.

Now it’s Time To Line up Your Scope

Now that your site is leveled and your eye relief is ready to tighten up the scope rings and inspect all components to ensure they are secured. Next line-up the cross hairs with the objective, keeping an ideal sight image as well as keeping your eye on the correct space from the scope. Modify for windage and elevation on your scope until it is lined up as accurately as you can. What you are trying to find is a sight image that is perfect when you are looking at the right cheek-weld and sight picture, you can look through your scope and be lined up with the same spot. It is extremely tough to do this with no firearm vise or another type of stabilizer.

Getting Ready At The Gun Range

It is ideal to bring your rifle and follow through with a couple of practice rounds and make the necessary alterations to get the feel of the scope. Each firearm is somewhat different, no matter how precise, sight it correctly and take your time to get used to this.

How to Sight in a Rifle Scope

Iron sights can be really nice for short and medium ranges, but they quickly lose their ability to hit a target at longer ranges. Using a telescopic scope will dramatically increase one’s accuracy at longer ranges. After all, nobody wants to fire at a target that is 300 yards away using iron sights. Most scopes are not adjusted properly when they are first bought, so additional adjustments will need to be done, depending on distance, velocity, wind, ballistic coefficient and much more. Sighting in a scope requires precision and patience on the shooter’s part.

The scope must first be bore sighted at 100 yards before making any other adjustments at the range. Bore sighting simply means adjusting the scope to where the bullet would hit the center of the cross hairs at a given distance, given the bullet has a perfectly flat trajectory. In reality, bullets do not have a flat trajectory, mainly because of gravity. Once the scope has been bore sighted at 100 yards, take a trip to a shooting range that has a distance of at least 100 yards. Some ranges are only for short distance, so going to an appropriate location in the mountains would be the best alternative. While taking this trip, bring a portable shooting bench rest. Distances should be accurately measured, rather than eyeballed.

First setup a large paper target at a 25 yard distance, preferably one that already has a bull’s eye. Before making any shots, get very comfortable with both the rifle and shooting bench. Any muscle tension or movement can easily throw-off a bullet. The best method is to avoid as much human contact with the rifle as possible. Pillows and folded blankets can make a big difference in comfort-ability. Use sandbags to rest the rifle on the shooting bench. Cat liter bags are a great alternative for those who cannot obtain sand bags.

While looking through the rifle scope, adjust it to where there is a clear image. Interestingly, the level just below the maximum magnification level is usually the clearest. Once a round is chambered and the cross hairs are over the bull’s eye, close the eyes for a good 10 seconds then open them. If the cross hairs moved from the target, then it means that there’s still muscle tension in the shooter. Find a comfortable position and keep doing this until the cross hairs don’t move.

Finally, fire a shot into the target once everything is lined up. It’s important to gently pull the trigger rather than suddenly tug it. Tugging at the trigger can throw off a shot. If the rifle moved while firing, then do it again. After firing a well-aimed shot, inspect the target to see where the bullet went. Sometimes, a person may be able to see the bullet hole through their scope, but they should definitely see it through a spotter scope. More than likely, the bullet won’t hit dead center on the target. However, it should hit somewhere on the target. Measure where the bullet hole is in respect to the bull’s eye and write it down. For instance, a miss that is three inches low and two inches to the right.

To make up for this, adjust the clicks on the scope according to the instructions. For an example, if it says that one click moves the center one-fourth of an inch at 100 yards, then multiply the number by four since the distance is only 25 yards. In the case where the bullet hit three inches low and two inches to the right, the person would want 48 clicks up and 32 clicks left. After everything is adjusted, take another shot at the target. Keep repeating this process until the bullet hits the center of the target. However, it doesn’t have to be a dead-center shot since the next step will be at 100 yards. If for some reason the bullet keeps missing the target, make sure that the scope is tightly mounted on the rifle, as this can dramatically affect shot placement.

Once everything is aligned at 25 yards, move the paper target out to 100 yards. Again, it’s important to actually measure it with some type of device. Repeat this very same process at the 100 yard mark, but wait until the rifle barrel has cooled down to ambient temperature, as barrel temperature may affect accuracy by causing more barrel harmonics. Wind is another factor to take into consideration. However, wind is a changing variable, so it would be wise to write down the click adjustments when there’s no wind. Doing so will allow one to easily adjust the scope while wind factors change.

For really long-range shooting, it’s best to have the bullet impact around three inches above the bull’s eye. This higher impact point will compensate for the bullet drop at longer distances, such as 300 or more yards. It also prevents the shooter from having to aim above the target. Keep in mind that different ammunition will give different trajectories. For instance, a lighter, faster bullet will have a flatter trajectory at relatively shorter distances but lower trajectory at longer distances. On the other hand, a heavier, slower bullet will have a lower trajectory at shorter distances but a flatter trajectory at longer distances.

In general, it’s best to stick with one particular type of ammunition, whether it’s factory or reloaded ammunition. Keeping one type of ammo will allow one to fine tune their accuracy. Once everything is adjusted, one will be able to shoot long distances without having to worry much about bullet drop. A scope has two main advantages. It allows one to see objects at longer distances in much greater detail. Two, it allows the person to compensate for bullet drop, which can’t accurately be done with iron sights. Keep in mind that scope adjustments are mainly up to the person’s liking. For instance, one doesn’t necessarily need to have the bullet impact a few inches higher at 100 yards.

If you want to see some videos of experts showing the rifle scope sight in process, here are some recommended ones to watch:

The Best Air Rifle Scope

Hunting and target shooting with air rifles has become an increasingly popular hobby for many men and women around the world. A large part of participating in this type of hobby is learning about and choosing the right equipment and attachments for your air rifle. While there are many different rifle scope options out on the market, you want to get something that is specifically made for air rifles. Not only will this save you money, but you know that the scope was designed with air rifles in mind.

Top-Rated Air Rifle Scopes

The following are some of the highly rated air rifle scopes that are available on Amazon.com:

Objective Lens Diameter

It is vital that the buyer knows that the diameter of the objective lens is responsible for the amount of light that is let in to the scope. A larger diameter will let in a greater amount of light. Keep in mind, that the larger the lens diameter, the heavier the scope. Note that if a scope has a lens diameter above 48mm, often additional mounting rings and bases are needed to place the scope at a higher level.

Reticle

Another vital component to understanding how the scope works is to learn that the pattern that is in the eyepiece of the scope is called a reticle, and it is responsible for establishing the position of the gun on the target. Types of crosshairs can include Fine crosshair, Duple crosshair, Mil-Dot, Target Dot, and Circle. Each type of crosshair is designed for different hunting locations, distances, and target sizes. Because of the variety available when choosing a reticle it is vital to choose the one that will best serve your purpose. For example, when long range shooting, often the dot on the reticle can cover up the target rather than aid in the shooting process and therefore a reticle without a dot may be what is needed for that particular type of shooting.

Scope Lens Coatings

Because scope lenses are made from glass that provides a clear image for the shooter, there is often a reflection that occurs as a result of light hitting the surface of the glass. The reflection can greatly impact the amount of light that is able to pass through the lens which impacts brightness. To avoid this, it is best to choose a scope lens with an applied coating. There are several different terminologies to learn regarding the different coatings and what they mean. For example, when a lens simply says that it is coated, it generally means that a single layer of coating has been applied to at least one surface of one lens, while Fully Coated means that there is a single layer on all air to glass surfaces. Then there is multicoated which means that more than one layer of coating has been applied to at least one lens, with fully multicoated meaning that there are multiple layers of coating to all air to glass surfaces.

Scope Magnification

When looking at the magnification of scopes, keep in mind that the magnification number simply represents the number of times the target is magnified in comparison with how one would see the item without a scope. There are scopes that are adjustable and offer a range of power and magnification, while others are designed with only a single magnification number.

How is the Air Rifle to be Used?

Now that you know a little bit about the different elements of an air rifle scope, the next step is to determine how your air rifle will primarily be used. For example, asking yourself what type of hunting you will be doing is a great place to begin. Depending on the type of hunting, different scopes are necessary because of the size of the animal as well as the location. The type of location is important because the terrain involved in your hunting spot plays a big role in range. The reason for this is that if you are shooting out in an open plain, you will have a longer range than if you are shooting in a closed in space up in the mountains or down in the swamplands.

Mounting your Scope

Air rifles are usually fitted with either a dovetail mount or a weaver mount, however, regardless of which type of mount your air rifle uses, it is important to prevent your scope from moving by using scope stop pins or plates to secure your scope. When it comes to whether to use a one or two piece mount, understand that while a one-piece mount is often the pricier choice, it is also thought to be the more stable option especially when used on a very powerful spring rifle.

Sighting in the Scope

Check out this awesome video on how to sight in your new air rifle scope:


Leupold VX-2 3-9x40mm Review

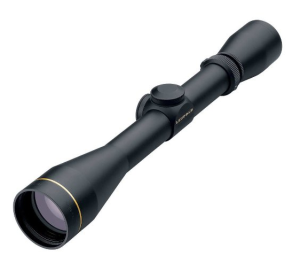
leupold vx-2 3-9x40mmThe old rule of thumb suggesting that one should invest as much in his optic as his rifle has been known to bewilder many a shooter. Not the least of these are the wise folks who have laid down a moderate amount of cash and walked away with a scope as impressive as the Leupold VX-II. Knowing the trust a committed sportsman must have in his equipment, Leupold has built the entire VX-II line to be as rugged and reliable as possible. No serious hunter wants to gamble on his success with questionable equipment, and will pick reliability over flash every time. Leupold builds the VX-II line specifically to cater to this market. Real-world, user-friendly features that increase reliability and performance are the name of the game. These scopes are designed for hard field use, and to take everything that the harsh conditions of a lifetime of hunts can dish out. Historically one of Leupold’s most successful riflescope series, the VX-II line continues to deliver world-class performance at an attainable price.
Out of the box, its 11.2 ounce weight places the deluxe-class VX-II as one of the lightest scopes in its category. Even so, the VX-II doesn’t skimp on toughness or features. The main tube is a two-piece unit, constructed of 6061-T6 aluminum, and filled with Leupold’s proprietary new Argon/Krypton gas blend. This gas provides excellent waterproofing and anti-fog characteristics superior to the older nitrogen gas one finds in many competing scopes. All of the glass is lead-free and coated on both sides with a special scratch-resistant DiamondCoat treatment. The VX-II is available in gloss black, matte black, and silver finishes. Only the matte black offers reticle options other than the standard Duplex, by giving the choice of Wide Duplex, German #4, Leupold Dot, and LR Duplex. Incorporating Leupold’s classic gold stripe and minimalist design, the VX-II 3-9x40mm is easy on the eyes in every way possible.

In operation, the VX-II is equally slick. An update from previous versions, new finger-adjustable “click” turrets and a smooth-rolling, knurled power-adjustment knob make for easy adjustment in the field. Those turrets are now also resettable to zero and feature 1/4MOA adjustment increments. There’s an additional option for a custom laser-engraved CDS elevation turret, which provides customized adjustment matched to the ballistic profile of individual rifles, settings, and loads.

The optical quality of the VX-II is typical of Leupold, with brilliant clarity and excellent light transmission. The edges of the sight picture are quite crisp and sharp, with no creeping fuzz or distortion. Throughout the magnification range, the reticle remains firmly centered in the scope; shooters don’t have to concern themselves with their zero shifting within the power range. Ocular focus can be individualized with a finger-adjustable knob, and set in place with a textured locking ring. The one-inch main tube and 40-millimeter objective lens with low-profile bell allow for easy mounting ring selection; most rifles should be able to use a set of standard low rings. Eye relief varies in an easy range of 3.7” to 4.2”, depending on magnification. Field of view is a very respectable 34.6 feet at 3x magnification, and 14.6 feet at 9x.

All of these features along with Leupold’s stellar customer support and industry reputation ensure that this scope is an excellent choice for any hunter or shooter. Though the price is about average for a scope in this category, the VX-II 3-9x40mm offers a lot of value for the money. It’s a class-leading scope with features and rugged reliability to match, ensuring many years of solid service.

If you want a second opinion on this incredible scope, you can check out the videos below:

Leupold Mark AR Rifle Scope Review

Leupold is known for making some of the world’s best rifle scopes. Their Mark AR scope is no exception, even though it’s one of their cheaper models. You’ll find that the scope provides reliable targeting for various ranges, and though there are some cons to consider, this is a perfect scope for anyone who doesn’t want to spend a fortune customizing their rifle.

General Information

The Mark AR is made specifically for 55-grain ammunition. While users have found that it works reliably with other types of ammo and guns, it works best if you stay within its intended use. The scope is matte black and looks identical to the Mark 2 Hunter scope.

Magnification is touted as going up to nine times normal sight, but tests show that it reaches closer to 8.6 magnification. The Mil Dot reticle is bright and easy to see, and it will help you easily aim shots at the appropriate target. Some have found that the dot tends to fade as the battery gets low on power, but changing the battery should fix this issue.

There is also an elevation knob to help you hit targets from 100 to 700 yards away. This works best with the appropriate ammo, and most users find it to be extremely accurate.

Elevation Knob

The elevation knob ensures that your scope is targeted properly so that you can hit targets from far distances. Most users find that it is perfect from 100 to 400 yards, but the reliability starts to decrease from 500 to 700 yards. This should come as no surprised because wind resistance and other factors will come into play, but you should still be able to hit larger targets from the maximum distance. You’ll notice some margin of failure, but it shouldn’t matter too much unless you’re trying to hit something small.

Waterproof

Nothing’s worse than getting water in the scope, but you’ll never have to worry about that with the Mark AR. Like all other Leupold scopes, this one is treated with nitrogen to keep water out of the optics and other components. It also has a second layer of argon and krypton waterproofing that further traps gases within the scope and refuses to allow water into any of the components. This is because argon and krypton are larger molecules than nitrogen, thus providing better protection. This second layer also reduces the effects of thermal shock.

Light and Reflection

If you have ever used a cheap scope, then you’ve probably noticed how light can be an issue. It reflects off the lenses in the scope and creates a glare that makes it impossible to aim properly. Not only those, but typically these scopes darken natural colors, which makes it harder to find targets.

The Mark AR is treated with Multicoat 4, a proprietary coating that reduces glare and usable light. While this won’t ensure proper targeting in all low-light conditions, it will give you the most usable light with the least amount of glare and reflection.

Firedot Illumination

Many scopes have red dots for illumination, and that has been a reliable targeting method for many years. The Leupold uses firedot illumination that is a more natural red that helps with quick target acquisition. The Mark AR comes with a tactical reticle that also assists with proper range estimation.

Conclusion

While cheap by Leupold standards, the Mark AR is a great rifle scope for anyone who likes hunting or shooting in general. The tactical scope ensures that you’ll be able to properly hit targets from far away, and the Multicoat 4 treatment will help you use the scope without eyestrain.

Bushnell H20 Compact Binoculars Review

Are you looking for a good pair of rugged starter binoculars that can withstand all types of terrains, temperatures, and conditions? There are many great brands and models on the market, but Bushnell H20 Compact Binoculars is one of the best waterproof marine optics available for those of who are looking for a good pair of starter binoculars.

These binoculars work great in any weather condition since they are 100% waterproof, fog proof, and dust proof. They include a nitrogen purging feature, as well as a central focusing system. The featured o-ring seal won’t allow water to penetrate within its walls. They are ideal for fishing, sailing, rowing, hiking, or skiing. They also work great in high altitudes or just about any rugged environment. These binoculars are also incredibly portable, with their compact size. It’s worth mentioning that these binoculars come in other models, which range from as large as 7×50, to 8×25, which is the smallest model that is available. The lens provides a very crisp image of objects that are in motion, as well as objects that are stationary and features magnification that is very powerful. These binoculars come in a sleek black color and are also made with BAK-4 prisms, which allows you to see brighter light transmission. The non-slip rubberized armor housing is also integrated into the binoculars, allowing you a good grip in any weather conditioner. Other features include the tethered lens caps, twist-up eyecups, a long eye relief, as well as the smooth central focusing knob.

One military reviewer even went as far as performing a dunk test, by dumping them in 1/2 m of almost freezing water for half an hour. He noted that they do, in fact, live up to the claims that they are waterproof and that the binoculars did not fog. He also noted that no water spots formed and that the rubber exterior did well in protecting the optics. This reviewer in particular tests products for police and military work.

These binoculars are great for a starter pair of binoculars for those who are actively spending time outdoors. Overall, this product is very good for the price, at around $38.99 at Amazon.com. Not only are they great starter binoculars, but they are very affordable. Compared to other starter H20 compact binoculars, these are definitely the best value. These binoculars also come with a lifetime warranty, so if they break for any reason your product is covered.

Although these are great binoculars, there are some drawbacks. First, the binoculars can be heavy at 10.23oz, which can be inconvenient when you are carrying them around during outdoor activities. There have also been reports of optics glares, which can interfere with your view when looking through the binoculars. It’s been stated that objects appear fuzzy around the edges and that it’s hard to see when looking directly into the sunlight. Lastly, the neck strap that is included is said to be thin and flimsy and that the lens cap can be lost easily, which aren’t a good features if you’re going to be performing rough outdoor activities. If you are going to be using these very frequently and will be doing very rough activities, these may not be right for you because of the weight and the flimsy neck strap. Or especially if you want something that is lightweight for use in activities such as backpacking.

Compared the competition, these binoculars really hold up to their claims. I highly recommend these binoculars for those who are starting out and need an affordable model of binoculars for all of their outdoor activities!

Bushnell Legend Ultra HD 8x42mm Review

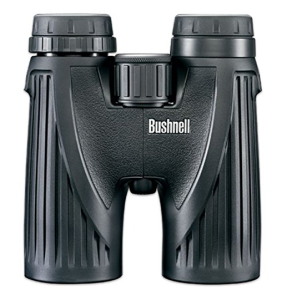
bushnell legend ultra hd 8x42mm reviewBushnell’s Legends have always stood out as some of the best binoculars in the market, and the new HD version has helped to add some extra punch to this venerable line of binoculars. The Bushnell’s Legend Ultra HD 8x42mm binoculars are fairly-priced, and give a sharp image with good contrast, and have far less fall-off in image quality as you get near the edges than comparable non-HD models.

Image Quality

Bushnell Ultra HD 8 x 42mm gives a sharp image right down to about 1.5m, making them excellent for all-round wildlife watching. The image remains quite sharp even at the edges with excellent close focus.

The image has a field view of 140m@1000m, and is good and wide. What’s really remarkable is that much of this field is highly usable, with the details, contrast as well as control of chromatic aberration excellent even well outside the image’s sweet spot. This can be chalked up to the fact that the binocular glass is fully multi-coated and uses extra low dispersion (ED) glass that is made of fluorite to reduce chromatic aberration. Image quality starts deteriorating at about 50% of the radius of the field of view but only gets fuzzy around at 20% radius from the edges.

While it’s true that Bushnell Legend’s field of view is smaller than that of higher-end binoculars, this is something that is more noticeable when the user is using a tripod, but hardly noticeable when the device is held in the hands.

Color fringing has been kept to a minimum and is only noticeable when it’s very bright outside, though even then it’s not a big problem. The image has a slightly yellowy cast to it that is not readily apparent unless you are used to those very high-end binoculars.

The Legend Ultra HD gives above average viewing in in low light conditions just as it does in bright light. The binoculars, however, tend to develop a few floating spots of light when a bright light is picked in a low light environment. This is, however, a lot more tolerable than the strong spikes of light that are seen to emanate from the light source when you are using a lower-quality pair of binoculars.

Focusing is smooth and precise. The binocular’s focus wheel travel is moderately stiff, which is a good thing because it only moves when the user moves it deliberately and not when it is disturbed accidentally. The focus wheel is a chunky 1.5 fingers wide, and takes 1.5 turns to move from close view to infinity. The binocular’s diopter (a pull-out ring that is located on the right side of the eyepiece) is chunky too and works well.

Build Quality

Bushnell’s Ultra HD Legend has a surprisingly good build for binoculars in its price point. The chassis is made of magnesium and provides a durable lightweight frame than aluminum alloys, making it easy to carry for extended periods. The heavily ridged armor gives the device a robust feel. The rubber-covered eyepieces are built to twist up and down to three positions and are comfortable to use for extended periods. They tend to remain in position without any problem as well. The objective lens covers are tethered to the device but are removable. A rainguard is present, though the device is waterproof and can even be washed with no ill-effects. The binoculars’ semi-solid case is capable of withstanding some pretty hard knocks with no damage to the device.

Final Verdict

Bushnell Legend Ultra HD 8x42mm binoculars are probably the best binocular system in their class. There are a number of HD binoculars available in the market today which offer better image quality, but they tend to be much more expensive. The Legends seems to do a pretty good job with unfussy and user-friendly features. Simply put, Bushnell Legend Ultra HD 8x42mm is the closest you can get to a pair of high-end HD binoculars at its price point. Definitely worth the money.